No. But for some aids, 3D printing technology makes perfect sense because of the lightweight and flexible material.
With this process, we can simulate your orthosis before it is produced.
Make an appointment by phone or send us a message!

Light, colourful, customised
Aids from the 3D printer
With 3D printing technology, aids can first be digitally designed and then printed out layer by layer. In orthopedic technology, we mainly use 3D printing to produce particularly light, flexible and at the same time highly functional aids (or parts of them). This is the case, for example, with some finger and hand orthoses, or with certain orthoses and prostheses that are specially made for children. If, on the other hand, larger aids are involved, production using 3D printing - compared to manual production from conventional materials - is not expedient.
A major advantage of 3D printing technology is the possibility of personalised design. Colours and patterns can be put together completely individually for 3D printed orthoses and prostheses.
Overview
3D printed orthoses and prostheses
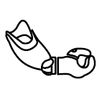
The PRINTORTHESE® is a forearm spiral orthosis with different variation possibilities.
The flexible material of the dynamic ankle-foot orthosis (AFO) allows the child's foot to roll dynamically.
The Pohlig hip abduction orthosis (PHAO) supports the hip and keeps it in the medically required abduction position.

The PowerHip® self-powered orthosis actively extends the hip of young spina bifida patients - using their own leg power!

The Concept 4D orthosis is a dynamic corrective positioning orthosis used after obstetric brachial plexus injuries.

The FIRST prosthesis is an extremely lightweight arm prosthesis for small children with various interchangeable attachments.
Individual solutions
Handbike orthoses from the 3D printer
Since Daniel has been paralysed due to a traffic accident, riding a handbike has played an important role in his life. However, in order to be able to grip the pedals, the 35-year-old needs hand orthoses that are adapted to his individual movement restrictions as well as the pedals.
At Pohlig we first scanned Daniel's arms. Afterwards, custom-made handbike orthoses were constructed for the para-athlete in our development department. Then we printed out the orthoses in our 3D printer, coloured them red to match Daniel's bike and fitted them with fasteners.


Let yourself be inspired! We accompany many interesting patients during their Pohlig appointment and give you personal insights.

For those who want to delve even deeper into the matter, we have a suitable video for almost every supply area.

Take a look behind the scenes at Pohlig and find out about diagnoses and our innovative aid solutions!
From the scan to the final fitting
Step by step to the 3D-printed aid
First, we make a 3D scan of the affected body region.
Based on the scan model, the aid is then virtually designed on the computer.
The 3D printer prints several designed aids at once. The results are in a single white powder block and need to be "unpacked" before we fully de-powder them.
In a paint drum that resembles the inside of a washing machine, all 3D-printed aids that are to receive the same colour are dyed red, green, blue etc.

In some cases, fasteners etc. have to be attached to the orthosis or prosthesis.
Once the 3D-printed aid is finished, it can be tried on. Minor corrections may have to be made to the orthosis or prosthesis - we refer to this final step as fine-tuning.


